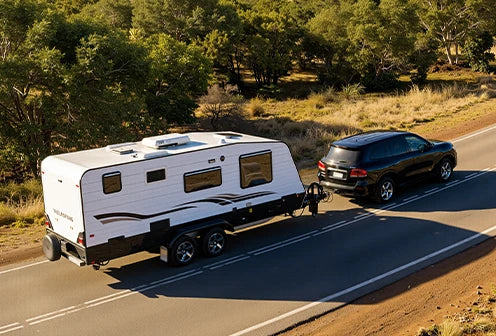
Modern touring setups – dual batteries, lithium house banks, solar on the roof, 12V fridges, inverters – ask a lot from your electrical system. At the same time, modern vehicles use smart alternators that don’t always provide a steady charging voltage.
A DC to DC charger sits between your starter battery and your auxiliary (house) battery and makes sure that second battery is charged properly, safely and efficiently, whether you’re driving, parked up on solar, or a bit of both.In this guide we’ll walk through what is dc to dc battery charger, how it works, and whether you actually need one in your setup – all in plain, practical Aussie English.
- Part1: What Is A DC To DC Battery Charger?
- 1.1 What is DC to DC charger? Uses and Size
- 1.2 DC to DC charger with solar input
- 1.3 DC–DC charger & AC-DC charger
- 1.4 DC–DC charger vs simple relay/VSR
- 1.5 Isolated vs non isolated DC to DC charger
- Part2: How Does A DC To DC Charger Work?
- Part3: What Does A DC To DC Charger Do?
- Part4: Do You Need A DC To DC Battery Chargers?
- Part5: How To Choose DC To DC Battery Chargers?
- Part6: DC to DC Charger Wiring Diagram
- Conclution
- FAQs
Part 1: What Is A DC To DC Battery Charger?
1.1 What Is A DC to DC Charger? Uses and Size

A DC to DC charger (also called a battery-to-battery charger) takes DC power from one source – usually your vehicle’s starter battery/alternator – and converts it into the correct voltage and charging profile for your auxiliary battery.
Typical uses:
- 4WD / overlanding setups – to run fridges, lights, compressors, inverters, and chargers from an auxiliary battery
- Caravans and camper trailers – charging a house battery from the tow vehicle while driving
- Campervans and RVs – reliable off-grid power for days at a time
- Boats – charging a house battery bank from the engine battery in a controlled way
- Trucks and commercial vehicles – running work lights, radios, tools, or tail-lifts from an auxiliary bank
Common sizes (output current):
- 20–30A – smaller setups, single battery, light touring
- 40–50A – mid-sized lithium or AGM banks, most 4WD/van builds
- 60A+ – larger battery banks, big inverters, heavy loads
The "size" you choose (e.g. 20A vs 40A vs 60A) affects how fast your auxiliary battery charges and how much load you can realistically support.
1.2 DC to DC Charger with Solar Input
Many modern DC–DC chargers also have a dedicated solar input. This means the unit can:
- Take charging power from the alternator while driving
- Take solar power directly from your panels when parked
- Manage both sources automatically without you having to flick switches
The solar side usually includes an inbuilt solar regulator, often MPPT, so you don't need a separate solar controller for those panels feeding the DC–DC charger.
Advantages of a DC-DC charger with solar input:
- Less hardware – you don't need a separate solar regulator for those panels feeding the charger
- Smarter priority – some units can prioritise solar first (free energy), then top up from the alternator
- Better charging – MPPT solar tracking squeezes more power from your panels compared to cheap PWM regulators
- Tidy wiring – one central box to manage both alternator and solar charging
1.3 DC–DC Charger & AC–DC Charger
What is a AC-DC Charger?It's easy to get confused between these two, so let's separate them:
| Feature | AC to DC Charger | DC to DC Charger |
|---|---|---|
| Power Input | AC power (wall outlet, shore power, generator) | DC power (vehicle alternator, solar panels) |
| Power Conversion | Converts AC to DC | Converts DC to regulated DC |
| Typical Use | Home, campsite, marina charging | RVs, caravans, marine, off-grid systems |
| Charging While Driving | No | Yes |
| Solar Input Support | Usually no | Often yes (combined alternator + solar) |
| Battery Compatibility | Lead-acid and lithium (model dependent) | Optimized for lithium and deep-cycle batteries |
In many real setups you will have both:
- On the road: DC-DC charger keeps your house battery topped up from the alternator and solar.
- At home / in a caravan park: AC-DC charger brings the battery up to 100% and maintains it when connected to mains.
They complement each other – one for the drive days, one for plug-in days.
1.4 DC–DC Charger vs Simple Relay / VSR
Before DC–DC chargers were common, lots of dual battery systems just used a voltage sensing relay (VSR) or simple solenoid.
A VSR / relay simply connects the two batteries together when the engine is running (voltage is high), and disconnects when the engine is off.It doesn't control voltage, current, or charging stages.
| Aspect | DC–DC Charger | Simple Relay / VSR |
|---|---|---|
| Voltage Control | Boosts or reduces voltage to reach ideal charging voltage at the aux battery. | No voltage adjustment; aux battery only sees whatever voltage reaches it after cable loss. |
| Smart Alternator Compatibility | Designed for smart alternators; keeps charging even when alternator voltage drops. | Often problematic with smart alternators; low voltage can mean poor or no charging |
| Battery Type Flexibility | Selectable profiles: AGM, GEL, flooded, calcium, LiFePO₄ etc. | Treats all batteries the same; suited mainly to basic lead-acid. |
| Charge Speed / Efficiency for Aux Battery | More effective, faster charging to higher state of charge, especially with deep-cycle batteries. | Can be slow and incomplete, often leaving batteries at 70–80% SOC. |
| Cost | Higher cost upfront (premium solution). | Low cost; budget-friendly. |
In short,a relay is cheap and simple, but a DC–DC charger is smarter, safer, and much better for modern vehicles and lithium batteries.But DC–DC charger is more expensive, needs correct configuration, more complex install and requires airflow.
1.5 Isolated vs Non-Isolated DC to DC Charger
DC-DC chargers come in Isolated and non-Isolated DC–DC charger two main designs.
| Aspect | Isolated DC–DC Charger | Non-Isolated DC–DC Charger |
|---|---|---|
| Basic Principle | Input and output are galvanically isolated – no direct electrical connection (including negative/ground). | Input and output share a common ground/negative; only the positive side is processed. |
| Typical Applications | Boats, marine systems, telecom, industrial, off-grid setups with separate ground references, sensitive electronics. | 4WDs, cars, vans, RVs, caravans, camper trailers – most standard automotive dual-battery systems. |
| Efficiency | Slightly lower efficiency on average due to extra isolation components (transformers, etc.). | Cheaper and more cost-effective for mainstream use. |
| Cost | Typically more expensive due to more complex design and components. | Cheaper and more cost-effective for mainstream use. |
For most everyday dual-battery setups in utes and 4WDs, a non-isolated unit is usually fine, unless your installer/electrician recommends otherwise.
Part 2: How Does A DC To DC Charger Work?
In the following section, we’ll take a closer look at how a DC to DC charger works and how it safely delivers power to your batteries.
2.1 How A DC–DC Charger Works
At a high level, a DC–DC charger:
- Takes incoming DC from the alternator or starter battery
- Measures the voltage and battery status
- Uses an internal buck/boost converter to:increase (boost) voltage if it's too low and decrease (buck) voltage if it's too high
- Follows a proper multi-stage charging algorithm (often: bulk, absorption, float) tailored to your battery type
- Limits current to its rated output (e.g. 40A), protecting wiring and batteries
You end up with a clean, stable charging voltage at the auxiliary battery, even if the alternator is all over the place.LiFePO₄ profiles often use a slightly different pattern, sometimes effectively bulk + absorb then standby, since LiFePO₄ lithium battery doesn't need a long float phase like lead-acid battery.

2.2 How a DC to DC Charger with Solar Input Works
A DC to DC Charger with Solar Input usually has Vehicle/alternator input and Solar input (from panels, via an inbuilt regulator) two potential inputs.Typical behaviour:
- Detects available sources – it reads voltages on both the vehicle and solar inputs.
- Applies priority rules – many units will:use solar first (since it's free), andAdd alternator power when needed or when solar is insufficient.
- Runs MPPT (Maximum Power Point Tracking) on the solar side – this adjusts the load on the panel to extract maximum power as sun and panel temperature change.
- Combines or switches sources as required while still respecting the charging voltage and current limits.
The charger prevents backfeeding: it won't send alternator power to your solar panels or allow solar to charge your starter battery unless specially designed for that.
2.3 DC–DC Charger Monitoring and Protection
Good DC-DC chargers don't just "push power"; they also protect your system and help you keep an eye on it.Common features include:
- Low input-voltage protection: If your starter battery drops too low, the charger stops drawing power.This ensures you can still crank the engine.
- High input-voltage protection: Protects the charger from spikes or abnormal alternator behaviour.
- Over-temperature protection: If the charger overheats (e.g. in a hot engine bay), it may reduce output or shut down temporarily to prevent damage.
- Short-circuit and reverse-polarity protection: Helps protect the charger and wiring if something is connected incorrectly or fails.
- Over-current protection: Ensures the charger doesn't exceed its rated output current.
- Monitoring/communication: LED indicators for charge stage, fault codes, source selection.Some models offer Bluetooth or other interfaces so you can see charging current & voltage,Battery state,Error history.
All of this makes a DC-DC charger not just a power device, but a safety and diagnostic tool for your 12V/24V system.
Part 3: What Does A DC To DC Charger Do?
Beyond the technical operation, a DC–DC charger plays a key role in improving charging efficiency, protecting batteries, and ensuring stable power delivery. In the next section, we’ll explain what a DC to DC charger does in practical terms and how it benefits your overall battery system.
3.1 Boosts or Reduces Voltage
The core job is to stabilise the charging voltage:
- If the alternator is sitting low (say 12.6–13.2V in a smart-alt vehicle), the charger boosts it up to a proper charging level (e.g. 14.2–14.6V for lithium, depending on settings).
- If the source is too high, it reduces it to a safe level for the aux battery.
This is essential for getting a full charge into your auxiliary battery, rather than creeping up to only 70–80%.
3.2 Set the Correct Voltage for Your Battery Type
Different batteries need different charge profiles:
- Flooded lead-acid & AGM have lower absorption and float voltages
- Gel prefers gentler charging and tight voltage control
- Lithium (LiFePO₄) typically likes higher bulk/absorption voltages and doesn't need a traditional float
Mordern most DC–DC chargers let you select a pre-set profile (AGM, gel, calcium, lithium, etc.), or sometimes custom-set the voltages.So your expensive battery bank is charged the way the manufacturer intended, which helps with Longer battery life,Better usable capacity,Fewer issues with under- or over-charging.
3.3 Overload Protection
While not the only line of defence, DC-DC chargers are part of your overload protection strategy.Because the charger is rated for a specific current (e.g. 20A, 40A, 60A), it will limit the current drawn from the alternator to the charger's rating,so a 40A charger won't suddenly try to pull 100A and stress your alternator.
Prevent your cabling from carrying more than it's designed for, when fused correctly.Often provide internal protection against short circuits or internal faults.
3.4 Protects the Starter Battery
One of the most important jobs is it helps ensure you can still start the car.
A DC–DC charger will only operate when the input voltage is high enough, or use an ignition trigger so it only charges when the engine is running.And stop charging if the starter battery voltage drops too low.
This focuses your alternator output on charging the aux battery when the engine's producing power, rather than letting your fridge quietly drain the starter overnight.

Part 4: Do You Need A DC To DC Battery Charger?
You don't always have to use one – but in modern setups it's often the safest, most reliable choice.Below is a practical breakdown so you can decide.
Have a Modern Vehicle with a Smart Alternator
Many new vehicles use smart alternators that drop voltage to save fuel and reduce emissions,not hold a steady 14+V like older vehicles.So your auxiliary battery may never fully charge if it's just connected via a relay/VSR.
A DC–DC charger boosts and regulates voltage so your house battery still gets a proper multi-stage charge even when alternator voltage is low or fluctuating.
Type of the vehicles can use DC To DC Battery Charger:
- Smart alternator vehicles – Modern Euro and Japanese cars (BMW, Mercedes-Benz, Ford, Toyota) use variable-voltage alternators that require a DC-to-DC charger for proper auxiliary battery charging.
- Start-stop vehicles – Cars with automatic engine stop-start systems need a DC-to-DC charger to protect both the starter and auxiliary batteries.
- Hybrid vehicles – Hybrids use complex DC systems where DC-to-DC charging is essential for managing multiple battery sources.
- Modern RVs and caravans – Newer motorhomes and caravans use DC-to-DC chargers to safely charge lithium auxiliary batteries while driving.
- Marine vessels with modern engines – Boats with smart alternators or lithium battery banks rely on DC-to-DC chargers for stable charging.
Using a Lithium (LiFePO₄) House Battery
A DC–DC charger with a lithium ion battery will limits current to a safe level,uses correct bulk/absorption voltage,and plays nicely with the BMS and helps avoid nuisance cut-offs.If you've invested in lithium, a DC–DC charger is strongly recommended rather than a simple relay.
Cable Run Is Long (e.g. Vehicle to Canopy / Caravan)
If your auxiliary battery is in the canopy or the rear of the vehicle,inside a caravan or camper trailer towed by the vehicle.Then voltage drop over a long cable can be significant. You might see only 12.6–13.0V at the aux battery, which is not enough for a proper charge.
A DC–DC charger at the aux battery end boosts the voltage back up (e.g. to 14.4V), overcoming voltage drop and ensuring a full charge.
Rely Heavily on Your 12V System
If you run things like
- 12V fridge/freezer running 24/7
- Lights, water pumps, fans
- Inverter for laptops, coffee machine, etc.
- Long off-grid stays (camping, touring, boating)
Then you need your batteries to charge properly while you drive. A DC–DC charger gives faster and more complete charging,better battery health,more predictable performance day after day for your serious touring and off-grid use, it's close to essential.
Protect Your Starter Battery
DC–DC chargers are designed to only charge when engine is running or starter voltage is healthy and shut down when the starter battery drops close to cranking level.So a DC–DC battery charger your house battery and loads won't accidentally flatten the starter battery. You get the security of knowing the engine will still start in the morning.
Part 5: How To Choose DC To DC Battery Chargers
Choosing the right DC-to-DC battery charger is a key decision for any dual-battery or off-grid vehicle setup. Below is a detailed guide on how to choose a DC-to-DC battery charger, followed by a set of recommended features and how to match them to your specific needs.
System Voltage (Input / Output)
Make sure the charger supports the correct input and output voltages for your setup. For example, if your vehicle alternator/starting battery is 12 V and your auxiliary battery is 12 V (common), you'll need a 12 → 12 V model. Some systems may need 24 → 12 V or 12 → 24 V etc.
Battery Chemistry Compatibility
Your charger should support the type of auxiliary battery you are using (flooded lead-acid, AGM, GEL, calcium, LiFePO₄ lithium, etc). This is critical because each chemistry has different optimal charge voltages, absorption times and safety profiles.
Amps (Current Rating / Size)
The charger's output current (e.g., 20 A, 30 A, 40 A, etc) affects how quickly you can charge your auxiliary battery while driving. But higher isn't always better — you must ensure your alternator can sustain it, and that your wiring and cable sizes are appropriate.
Smart Alternator / Long Cable Runs Considerations
If your vehicle has a "smart alternator" (one that lowers voltage when battery is full or at idle) or if your aux battery is located far from your starter battery (long cable run), then a DC-to-DC charger that can boost voltage or regulate properly becomes important.
Solar Input / Combined Charging Options
If you plan to integrate solar panels (or already have them), you may want a charger that either has a dedicated solar input / MPPT regulator built-in, or at least can be teamed with one. Some DC-DC units include solar input to handle both alternator and solar charging.
Efficiency & Heat / Size / Mounting Location
Higher efficiency means less wasted energy (less heat) and better performance especially in tight spaces or harsh environments. Also check where the unit will be mounted (engine bay vs cabin) and ensure it has adequate cooling and clearance.
Safety / Protection / Monitoring Features
Look for features like:
- Over-voltage / under-voltage protection
- Over-current protection
- Thermals / over-temperature cut-off
- Reverse polarity protection
- Monitoring options (LED indicators, Bluetooth/app, fault codes)
These features help protect your batteries and the charger itself.
Cost / Value / Warranty
While you don't always need to buy the most expensive model, choosing a reputable brand with good warranty and support can save problems later. Cheap units might lack the features or robustness required for heavy use.
Part 6: DC to DC Charger Wiring Diagram

Every brand will have its own exact wiring diagram, but most DC–DC setups follow this basic pattern:
Starter battery and alternator
- Positive cable from the starter battery to the DC-DC charger input (+).
- Fit a fuse or circuit breaker close to the starter battery (e.g. 40–60A depending on charger size).
- Negative is usually shared via chassis or a dedicated negative cable.
Ignition or trigger wire (if required)
- Some chargers need an ignition signal so they only operate when the engine is on.
- This wire connects to an ignition-controlled source (ACC/IGN).
Auxiliary (house) battery
- Positive cable from the DC-DC charger output (+) to the aux battery positive.
- Again, fit an appropriate fuse or breaker close to the aux battery.
- Negative from aux battery back to chassis or directly to the DC-DC negative/output negative.
Loads (fridge, lights, inverter, etc.)
- Connect to the aux battery, typically via a fused distribution panel.
Solar input (if the charger has it)
- Solar panel positive and negative run to the solar input terminals on the charger (not straight to the battery, unless specified).
- A solar isolator switch or fuse is often fitted near the battery or charger for safety and maintenance.
Key safety points:
- Always fuse as close as practical to each battery terminal.
- Use appropriate cable sizes for both the current and the distance.
- Follow the manufacturer's wiring manual and local electrical standards.
- Avoid combining old VSR systems and new DC-DC chargers in strange ways unless the manufacturer explicitly supports it.
Conclusion
A DC to DC battery charger is the heart of a modern dual-battery or off-grid touring setup. It ensures your auxiliary battery is charged properly and safely,works with smart alternators and modern lithium batteries,integrates nicely with solar,protects your starter battery, wiring and gear.
If you rely on your aux battery for fridges, lights, pumps and inverters when you're out exploring Australia, investing in a quality DC–DC charger is one of the best things you can do for a reliable, stress-free setup.
FAQs
Q1: Can a DC-to-DC charger damage my battery?
A correctly installed and configured DC–DC charger is designed to protect your battery, not damage it. It applies a controlled, multi-stage charge at the right voltage and current for your battery type.
Damage usually occurs if the wrong battery type/profile is selected,voltages are set incorrectly, or the system is poorly wired (undersized cables, no fuses, bad connections).Always match the charger profile to your battery's specs and follow the manufacturer's instructions.
Q2: Do DC-to-DC chargers drain the main battery?
A quality DC–DC charger will not drain your starter battery when everything is set up properly. It will only operate when the input voltage is above a safe threshold, or only turn on when the ignition is on/engine running.
When the engine is off and the starter battery voltage drops, the charger should stop drawing power, helping ensure your starter battery is kept for starting the vehicle.
Q3: Do I need a solar regulator if I have a DC-DC charger?
If your DC–DC charger has a dedicated solar input with a built-in regulator (often MPPT), you do not need a separate solar regulator for those panels feeding the charger.And if your DC–DC charger doesn't have a solar input, then you do need a separate solar regulator between the panels and your battery.
--------------------------------------------------------
You also can read:
How to Charge Lithium Ion Battery Safely [Safe & Correct Guide]
What Is Battery Capacity?The Guide To Calculate & Choose
Best Lithium Battery for Caravans in Australia – What You Need to Know Before Buying
