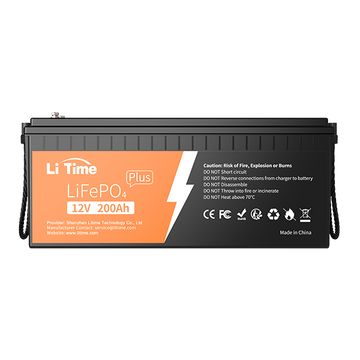
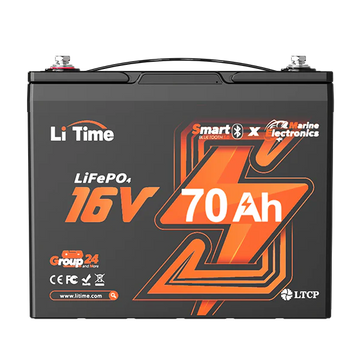
LiTime is dedicated to providing stable, safe, and sustainable LiFePO₄ energy systems for camping, RVs, boat fishing, off-road, and off-grid applications. The “Li” honors the pioneers of lithium technology and their spirit of innovation, while “Time” symbolizes our promise across generations – to provide clean energy that reliably accompanies outdoor adventurers on their journeys.
LiTime places the highest importance on technical safety and strict quality control. Every battery is equipped with an intelligent BMS protection system that reliably prevents overcharging, deep discharge, short circuits, and temperature deviations. All products are tested multiple times to ensure stable performance even under extreme conditions – heat, cold, or vibration.
We offer a warranty of up to 5 years on all LiFePO₄ products, as well as technical support with response times within 12 hours. Whether you need installation instructions, application recommendations, or after-sales support – our team is always at your side with professional help.
LiTime believes: Respect for innovation, persistence in quality, and long-term service are the foundation of every worry-free journey.
2.Preparation,Installation Guide
2.1 Tools & Preparation
After understanding the LiTime brand and product features, the next step is installation. To ensure safe and efficient installation, this section helps you prepare the necessary tools and check the condition of the battery before connection. Good preparation prevents damage from reversed polarity or loose connections.
Required tools
Tool type
Tool name
Purpose
Basic equipment
Phillips screwdriver / wrench
To tighten battery terminals and brackets
Electrical tool
Multimeter
For voltage measurement and polarity check
Cables & wiring
Copper cable (min. 6 AWG)
To connect battery, charger, and load
Accessories
Electrical tape / cable ties
For protection and fixation of wiring
Safety equipment
Insulated gloves / safety glasses
To avoid short circuits and electrical hazards
Note: For serial or parallel connection, identical batteries with the same capacity and same state of charge must be used. Prepare suitable connection cables and terminals in advance.
Check before installation
Check voltage: Use a multimeter to ensure the battery voltage is in the range of 13.0 V ± 0.2 V.
Visual inspection: No cracks, moisture, or deformation on the housing.
Environment: Dry, well-ventilated, no direct sunlight or high humidity.
Polarity: Red = positive (+), black = negative (–). Never reverse.
Positioning: Place the battery horizontally, do not tilt or invert.
Safety precautions: Switch off all consumers and chargers before installation.
Ready for installation
Once all tools and checks are completed, you can start the connection according to the “Quick Start PDF” or the next chapters. Make sure all terminals are tightly fastened, no cables are too thin or too long, and the number of connections complies with the technical specifications.
2.2 Installation Instructions
After completing the checks of tools, environment, and battery condition, we now proceed to the actual installation and commissioning.
Step-by-step instructions for connecting LiTime LiFePO₄ batteries – safety, voltage equalization, series and parallel connection with correct polarity.
Standard wiring (12 V system)
Mounting the battery: Secure the battery in the designated tray/with straps (ensure heat dissipation and leave service clearance).
Clean terminals & torque: Keep poles and cable lugs clean and dry; tighten with the recommended torque (preferably with lock/spring washers).
Sequence – positive before negative: First connect positive (+) to the positive busbar/fuse/circuit breaker, then connect negative (–) to the negative busbar.
Circuit protection: Install an appropriate fuse or circuit breaker close to the battery positive.
Power-on self-test: Close the protective switch and check whether the system starts up normally – without warnings or noises.
Low-load test: Test with a small load (e.g. light/small inverter) for 3–5 minutes; check for stable voltage and absence of heating.
LiTime also provides official video guides to avoid installation errors and visually support the process.
2.3 Series or parallel connection (more capacity / higher voltage)
Series: Plus-to-minus → voltage adds (e.g. 4 × 12.8 V = 51.2 V / 50 Ah).
Before combining: Fully charge all batteries and equalize them in parallel for 12–24 h.
Cables: Same length, cross-section ≥ 6 AWG, preferably tinned copper.
Maximum combination: 4 S / 4 P recommended (max. 16 units).
2.4 Installation safety
No “hot plugging”: Always switch off chargers/loads first, then connect the battery.
Terminal covers: Cover terminals with insulating caps after connection.
Ventilation: Do not use sealed boxes without air circulation; 10 cm of clearance around the battery is recommended.
Moisture protection: IP65 – splash-proof, but not for permanent submersion.
Avoid metal contact: Do not place tools or jewelry near the terminals.
2.5 After installation
Voltage = 13.2–13.3 V → fully charged.
After 1 week: Check terminals, cable strain.
For idle times > 3 months: Charge to approx. 50% SOC and store in a dry place.
Regular function check (every 3 months → charge/discharge test).
3.Charging Methods & Parameters
Charging methods and parameters of the LiTime LiFePO₄ lithium ion battery – CC/CV charging principle, recommended voltages, currents, and temperature limits for AC, DC-DC, solar, and inverter charging
Connection and basic functions are set up. This chapter describes the charging strategies and settings for the LiTime LiFePO₄ (38L housing) in typical scenarios: AC charger, DC-DC in vehicle/boat, solar MPPT/PWM, inverter with charger function – for efficient and stable charging in camping/RV, marine/trolling motor, and off-grid solar use.
3.1 Charging principles & safety limits
Principle: CC → CV (constant current → constant voltage).
Voltage: 14.4–14.6 V in the CV phase; fully charged at approx. 1 A residual current (≈ 0.02 C).
Float:No permanent float charging; if necessary, limit to 13.4–13.6 V.
Temperature: Ideal charging between 0–50°C; below 0°C only with low-temperature limit/pre-heating.
3.2 AC charger (shore power/household)
Mode: LiFePO₄ / 14.6 V.
Current: Recommendation 10 A (≈ 5 h to full); fast charge 25 A (≈ 2 h to ≈ 97%).
Wiring: Voltage drop < 3%; for > 20 A → 8 AWG / 6 AWG copper.
Sequence: First connect to battery → then mains; when disconnecting, first mains → then battery.
Maintenance: For parallel setups, perform equalization/rebalancing every 6 months.
Operation: Use residual-current-based charge termination; avoid permanent float charging.
3.6 Capacity estimation & quick SOC check
Open-circuit voltage method (battery at rest ≥ 3 h):
Voltage (V)
SOC (approx.)
13.33
≈ 100%
13.2–13.3
≈ 75%
13.1–13.2
≈ 50%
13.0–13.1
≈ 25%
10–12
≈ 0%
Influencing factors: Load and temperature distort measurements; resting voltage is more meaningful.
Monitoring: Use Bluetooth BMS/app for live values (U/I/SOC/cycles), especially for marine/trolling motor setups.
3.7 Common charging problems & troubleshooting
Symptom
Possible cause
Action
No charging / 0 V
BMS protection active
Disconnect system, wait 30 min, then use charger with 0 V activation
14.6 V reached but missing capacity
Residual current not considered / excessive voltage drop
Check cable cross-section/crimping, harmonize parameters, use residual current criterion
Charging blocked in cold
Low-temp protection
Warm/insulate battery, then charge again
Very slow charging
Low PV power / line losses
Increase PV, optimize wiring/controller range
Permanently high voltage (float)
Float not deactivated
Deactivate float or set to 13.4–13.6 V
4. What to do when the battery stops working
When the battery can’t work, can’t be charged, or the voltage is below 9V, there is about an 85% chance that the BMS has shut it off for protection. You can try the following steps to activate the battery.
General Steps
If the BMS has cut off the battery for protection, follow these steps:
Step 1 Cut off all connections from the battery.
Step 2 Leave the battery aside for 30 minutes. The battery will automatically recover to normal voltage (>10V) and can then be used after being fully charged.
If the battery is unable to recover after the steps above, try one of the following two methods to activate it.
Once activated (voltage >10V) and fully charged using the normal charging method, the battery can be used normally.
Method 1 Use a charger with lithium battery activation function to fully charge the battery.
Method 2 Connect a controller that supports 12V LiFePO₄ battery charging and charge the battery for 3–10 seconds in sunny conditions.
5. Maintenance & Storage
Maintenance and storage of the LiTime lithium battery – recommended SOC/voltage table, temperature and storage conditions, maintenance intervals, and 0 V reactivation note.
The LiTime deep cycle battery is largely maintenance-free; however, proper care and storage significantly extend its service life. This section describes recommended maintenance cycles, SOC strategies, and storage conditions for different application scenarios.
5.1 Regular maintenance
Monthly: Measure voltage (target value 13.2 ± 0.1 V); check contacts, no corrosion or looseness.
Every six months: Perform one full charge/discharge test, SOC calibration with LiFePO₄ charger.
Annually: Visual inspection of housing for deformation, cable insulation, fuse contact, and BMS function.
After long-term storage: Bring battery to 50–60% SOC, perform one cycle after recommissioning.
5.2 Storage recommendations
Storage SOC: 50–60% (≈ 13.1 V).
Storage time: Up to 6 months without recharging; for longer storage, check voltage every 3 months and recharge if necessary.
Temperature range: -10°C to +35°C, ideally 15–25°C.
Humidity: 60% RH, dry and dust-free.
Orientation: Preferably horizontal, do not tilt or drop.
Disconnection: Before storage, disconnect all consumers/chargers; no permanent connections.
5.3 SOC monitoring during storage
Voltage (open circuit)
Estimated SOC
Recommended action
13.3 V
≈ 100%
Too high for storage → discharge slightly
13.1–13.2 V
≈ 50–60%
Optimal for long-term storage
12.8–13.0 V
≈ 30–40%
Slightly recharge before storage
< 12.5 V
< 20%
Charge immediately to avoid deep discharge
5.4 Behavior after deep discharge / BMS shutdown
Symptom: No voltage (0 V) at terminals → BMS protection triggered.
Cause: Deep discharge or overcurrent/overtemperature.
Solution: Disconnect the battery from the system, wait 30–60 minutes, then reconnect with a LiFePO₄ charger (with “0 V activation”).
After recovery: Perform 100% charge, check SOC, and run one discharge cycle for calibration.
5.5 Cleaning & protection
Housing: Wipe with a slightly damp cloth, do not use solvents or acids.
Terminals: Clean with a fine brush, then lightly coat with terminal grease or petroleum jelly.
Contact points: Regularly check for corrosion, dust, or loose screws.
Environment: Keep battery dry, low-vibration, and free of metallic debris.
5.6 Downtime and seasonal use
Winter break: Charge to 50% SOC, disconnect, store frost-free (use insulated box if necessary).
Summer break: Reduce load, avoid permanent float voltage; recharge every 3 months if needed.
After recommissioning: Check voltage, fully charge/discharge once, and inspect all connections.
6. Safety & Error Symptoms
Fault diagnosis and recovery of the LiTime LiFePO₄ battery – BMS protection, diagnostic and recovery steps with 0 V charger and solar activation
The LiTime lithium ion battery is equipped with an intelligent BMS (Battery Management System) that provides multiple protection levels for voltage, current, and temperature. This chapter explains the protection functions and shows how to interpret and resolve typical error symptoms.
6.1 Integrated BMS protection functions
Voltage (open circuit)
Estimated SOC
Recommended action
13.3 V
≈ 100%
Too high for storage → discharge slightly
13.1–13.2 V
≈ 50–60%
Optimal for long-term storage
12.8–13.0 V
≈ 30–40%
Slightly recharge before storage
< 12.5 V
< 20%
Charge immediately to avoid deep discharge
6.2 Behavior when BMS trips
System unresponsive / 0 V measured: BMS protection has triggered. → Disconnect all loads, wait 30–60 min, then charge with a charger that supports 0 V activation.
Voltage recovers briefly after trip: Overcurrent shutdown; check whether the load is oversized.
Charging not possible despite mains voltage: Overtemperature/undertemperature → check environment, let battery acclimate.
Bluetooth version: Open app → check BMS status (protection flags) → after resolving the issue, reset occurs automatically or after 60 s.
6.3 Typical error symptoms & solutions
Symptom
Probable cause
Recommended action
Battery shows 0 V
BMS deep-discharge protection active
Use charger with 0 V function, charge for 30 min
Charger does not start
Polarity reversed / voltage too low
Check polarity, if needed provide 12 V reference
Voltage drops quickly under load
Cables too thin / corrosion / high load
Check cable cross-section, clean contacts
Temperature warning
Ambient > 60°C / direct sunlight
Shade battery, improve ventilation
Bluetooth app shows no connection
Smart BMS deactivated / signal shielded
Enable Bluetooth within 3 m, keep battery active
Battery does not charge in winter
Low-temp charge blocked
Warm battery, wait until temperature > 5°C
Permanently high voltage (15 V+)
Charger not set to LiFePO₄
Switch mode to “LiFePO₄” / 14.6 V
6.4 Safety instructions for working with the battery
Never open the housing – this voids the warranty and poses safety risks.
Use only insulated tools, do not place metallic objects above the terminals.
Do not connect in parallel with lead-acid or gel batteries.
Do not use high-current chargers without LiFePO₄ mode.
Fire protection: Install smoke detector in enclosed rooms, keep fire blanket or ABC extinguisher within reach.
6.5 Behavior with error messages (Smart BMS via app)
OVP (Over Voltage Protection): Stop charging → check voltage → once below 14.2 V, operation returns to normal.
UVP (Under Voltage Protection): Charge battery → if no reaction, wait for BMS reset or use 0 V charging function.
OCP (Over Current Protection): Check load/charger → reset after relief.
OTP / UTP: Check temperature → stop operation, improve ventilation or let battery acclimate.
6.6 Recommended safety routine
Perform visual inspection and voltage measurement before each use.
Do not leave uninsulated metal parts above the terminals.
Install fuses close to battery positive.
Regularly check BMS status (via app or multimeter).
In the event of unusual heating → switch off immediately and check surroundings.
7. FAQ
Q1: Does the battery need to be charged first after delivery?
No, the battery is shipped at approx. 50% ±10% SOC and is ready for immediate use. After long-term storage, fully charge (100%) once before use and then operate normally.
Q2: The battery is not charging – what should I do?
Check whether the charger is set to LiFePO₄ / 14.6 V (CC/CV).
Is the polarity correct? Check (+ / –).
In case of deep discharge: The BMS may have shut down – use a charger with 0 V activation (wake-up function) and charge normally after 30 minutes.
Q3: Can I combine the battery with lead-acid batteries?
Not recommended. Different charging profiles lead to uneven capacity, overcharging, or undercharging. Use LiFePO₄ systems only with a suitable charger.
Q4: Is parallel or series connection possible?
Yes, up to a maximum of 4S / 4P. Combine only identical types and capacities. Before connecting, fully charge all batteries, equalize voltage, and let them rest for 12–24 hours.
Q5: Can I charge the battery in cold weather?
Do not charge normally below 0°C. Use a charger with low-temperature protection or warm the battery to above 5°C before charging.You can view more about LiTime cold weather batteries.
Q6: How long can the battery remain unused?
For extended idle periods, store at 40–60% SOC and recharge every 3 months to avoid deep discharge.
Q7: How many charge cycles does the battery achieve?
Typically ≥4000 cycles at 80% depth of discharge (DoD). This corresponds to a service life of approx. 8–10 years under normal use.
Q8: Can I use the battery with an inverter in a vehicle?
Yes, provided the inverter is LiFePO₄-compatible. Observe correct voltage limits (OVP 15.0 V / UVP 10.8 V).
Q9: May the battery be used in a lying position?
Yes, horizontal operation is uncritical. Ensure stable mounting and sufficient ventilation to avoid overheating.